TL;DR
A step-by-step guide to creating and managing GitLab CI/CD pipelines for development, staging, and production environments with best practices and optimization techniques.
Introduction 🚀
Welcome to our beginner-friendly guide on setting up GitLab CI/CD pipelines! Think of a CI/CD pipeline like a cooking recipe - you follow a series of steps to create something amazing. In this case, we're creating an automated way to deliver your code from development to production.
$1
.gitlab-ci.yml file$1
Before we start, make sure you have:
Understanding CI/CD Basics 🎓
CI/CD stands for Continuous Integration and Continuous Deployment/Delivery. Let's break it down:
- Automatically building and testing your code
- Finding and fixing bugs early
- Keeping your code quality high
- Automatically deploying your code
- Managing different environments
- Ensuring smooth releases
Creating Your First Pipeline 🎯
Let's create a simple pipeline. Create a file named .gitlab-ci.yml in your project root:
`` stages:
- build
- test
- deploy build-job:
stage: build
script:
- echo "Building the application..."
- npm install
- npm run build test-job:
stage: test
script:
- echo "Running tests..."
- npm run test deploy-staging:
stage: deploy
script:
- echo "Deploying to staging..."
environment:
name: staging
only:
- develop deploy-production:
stage: deploy
script:
- echo "Deploying to production..."
environment:
name: production
only:
- main
yaml
`
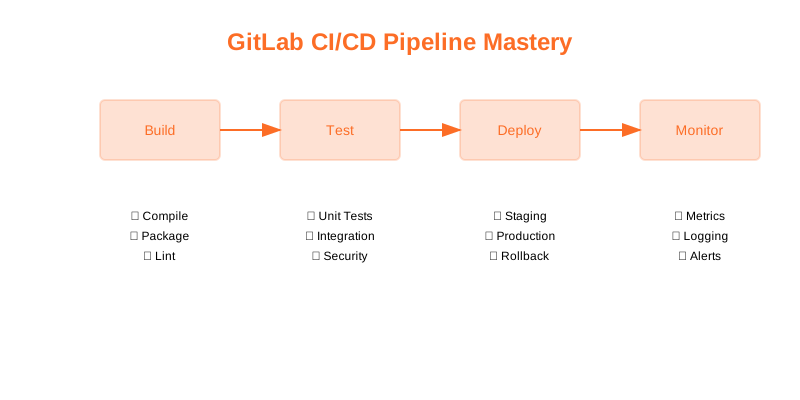
Pipeline Stages Explained 🔍
$1
This is where we prepare our application:
$1
Here we ensure everything works:
$1
Finally, we deploy our application:
Environment Variables and Secrets 🔐
Keep sensitive information secure using GitLab's CI/CD variables:
1. Go to Settings > CI/CD
2. Expand Variables section
3. Add your variables:
- API keys
- Database credentials
- Environment-specific configs
Best Practices 💡
1. Keep It Simple
- Start small and expand gradually
- Use clear, descriptive names
2. Cache Dependencies
` cache:
paths:
- node_modules/
yaml
`
3. Use Pipeline Templates
- Create reusable configurations
- Maintain consistency across projects
4. Monitor Performance
- Watch pipeline duration
- Optimize slow stages
Troubleshooting Tips 🔧
Common issues and solutions:
1. Pipeline Fails to Start
- Check runner availability
- Verify .gitlab-ci.yml` syntax
2. Build Errors
- Check dependency versions
- Verify build scripts
3. Deploy Failures
- Check environment variables
- Verify deployment credentials
Next Steps 🎯
Now that you have your basic pipeline:
1. Add more test stages
2. Implement code quality checks
3. Add deployment notifications
4. Set up monitoring
Conclusion 🎉
Congratulations! You've created your first GitLab CI/CD pipeline. Remember:
Need help? Check out:
Happy coding! 🚀
Why This Matters
Understanding the business and technical context helps you make informed decisions rather than blindly following patterns.
Trade-offs to Consider
Every architectural decision involves trade-offs. Consider your specific requirements, team expertise, and scale when evaluating options.
When NOT to Use This
Knowing when a solution doesn't apply is as valuable as knowing when it does. Consider alternatives for your specific situation.
Decision Framework
Use this framework to evaluate whether this approach is right for your use case based on your specific constraints and requirements.